Moisture Check
This is the #1 cause of epoxy failure in Wisconsin garages.
Tape a 12"×12" plastic sheet to the bare floor on all 4 edges. Wait 24 hours. Condensation under plastic = moisture vapor present.
Why WI Concrete Fails Under Epoxy
Wisconsin garages are one of the worst environments for epoxy floor coatings — and most homeowners don't find out until they're scraping up a failed coating two years after install. Understanding the failure modes before you invest is the difference between a 15-year floor and a 2-year mess.
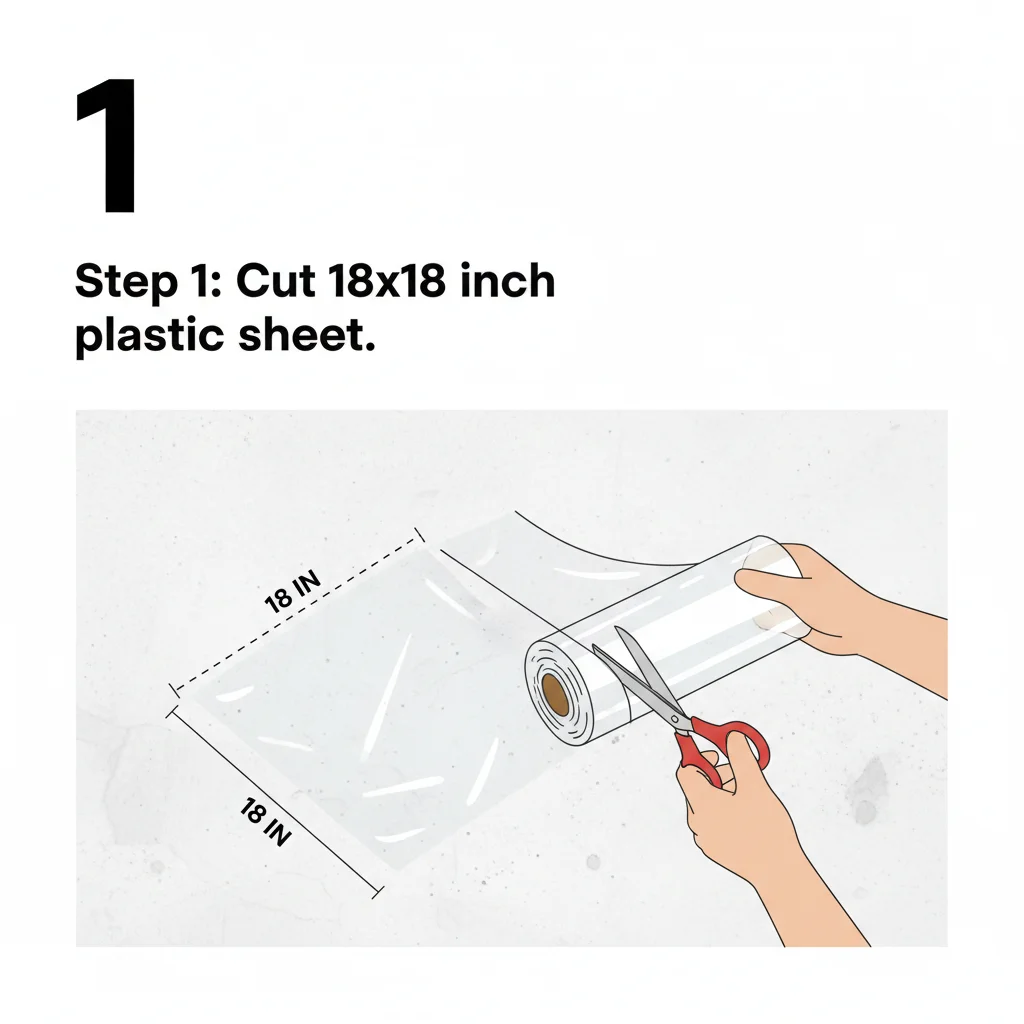
The Plastic Sheeting Test (Do This Tonight)
The most common cause of epoxy failure in Fox Valley is invisible moisture vapor. This test catches it before you spend a dollar on coating.
Cut an 18"×18" piece of plastic sheeting
Tape all 4 edges to the bare concrete floor with duct tape — no gaps
Leave undisturbed for 24 hours
Lift one corner: condensation under plastic = moisture vapor present — requires mitigation primer before any coating
If moisture is present, ask contractors about moisture-tolerant primer systems (+$0.75–1.50/sq ft). Run our risk assessment to understand your full prep picture.
Signs Your Floor Will Reject a Coating
These four conditions cause the majority of epoxy failures in Wisconsin garages. If your floor has any of them, they must be addressed before coating — not after.
Oil penetrates 1–3mm into concrete and prevents chemical bonding. Even 'clean' stains from years ago cause failure. Requires mechanical grinding + degreaser treatment.
White mineral deposits mean active moisture migration through the slab. Not patchable on the surface — the moisture source must be addressed first.
Any existing coating that isn't fully bonded will take new epoxy with it when it lets go. Full removal via shot blasting or diamond grinding is the only fix.
Moving structural cracks will telegraph through the coating — visible cracks appear in the finished floor. Requires evaluation and semi-rigid crack fill before coating.
What a Failed Coating Actually Costs
When an epoxy coating fails in a Fox Valley garage — typically year 1–2 when prep was skipped — the total cost to fix it almost always exceeds what it would have cost to do it right the first time.
| Line Item | Cost (2-car, 500 sq ft) |
|---|---|
| Original coating (avg) | $2,250 |
| Removal — diamond grind failed coating | $1,250 |
| New surface prep (re-grind + decontam.) | $750 |
| Recoat — full-chip system | $2,750 |
| Total cost of failure scenario | $7,000 |
| Done right the first time | $3,500 |
The math is simple: A redo costs 2× the original project. Proper prep on the first install — including moisture mitigation if needed — is always cheaper than fixing a failure.
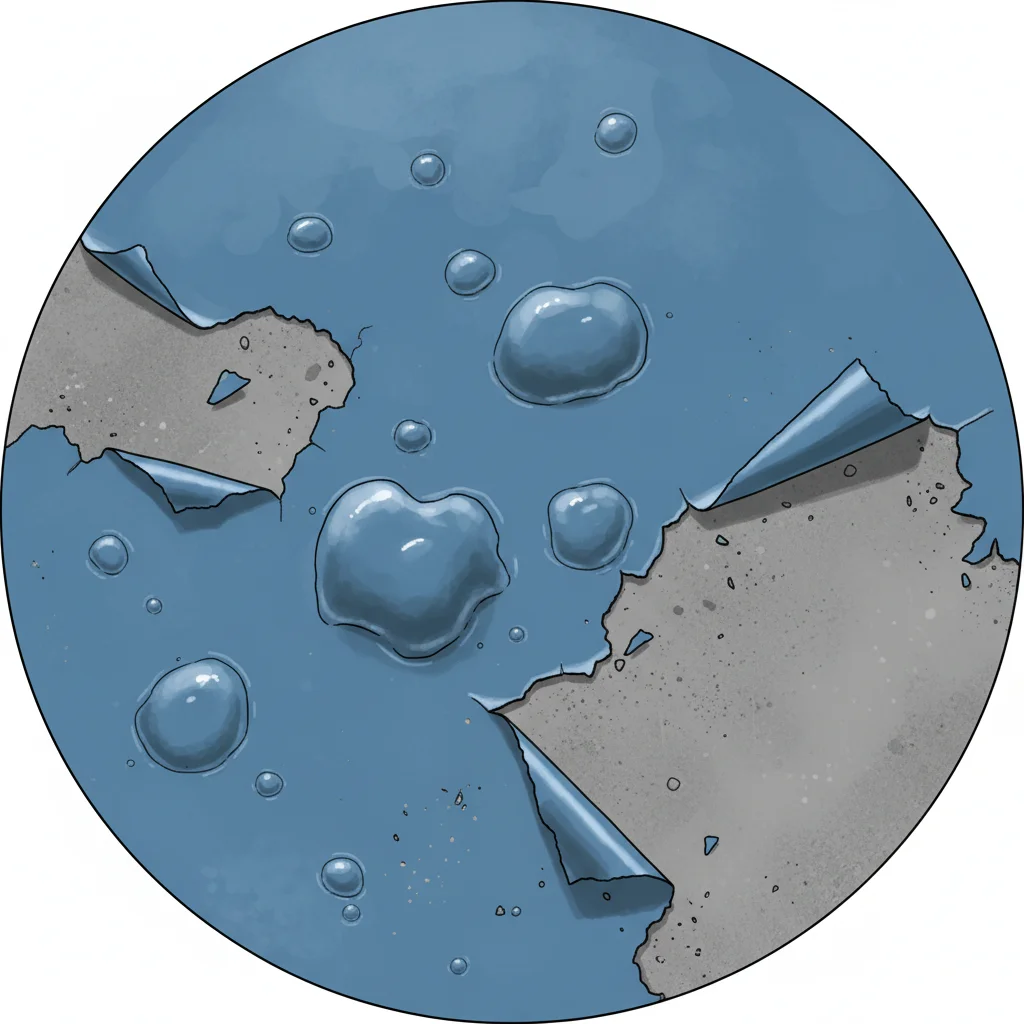
What epoxy failure looks like: peeling edges, bubbling, and lifted sections revealing bare concrete. This floor will need full removal and a redo.
What Proper Prep Looks Like
A properly prepped floor has a Concrete Surface Profile (CSP) of 3–4 — rough like 60-grit sandpaper. Here's the full sequence a reputable Fox Valley installer follows before any coating goes down.
Open concrete pores, remove sealers and paint, create CSP 3–4 profile across the full floor.
Semi-rigid epoxy or polyurea filler in all cracks and joints. Flexible enough to move with the slab.
Plastic sheeting test or Tramex meter reading. Moisture above threshold requires mitigation primer.
Vacuum, damp wipe, visual inspection. Floor must be 100% clean, dry, and profiled before coating.
Then, and only then, the coating goes down.
Any contractor who skips or combines steps is cutting corners on the most important part of the job.
Want to understand what your specific floor needs? Use the floor risk assessment above, or check our verified Fox Valley installers who follow this full prep process.