
What Is Floor Prep & Repair?
Floor prep isn't sweeping and mopping. It's mechanical surface modification — removing contaminants, repairing structural damage, and creating the specific texture profile that allows coatings to bond at the molecular level.
Your concrete surface right now is either too smooth (power-troweled, sealed) or too damaged (cracked, spalled, oil-soaked) for epoxy to stick. Both problems require grinding. One requires repair first.
Why Prep Matters for Coating Success
The concrete surface profile (CSP) determines coating bond strength. Think of it like sandpaper grit — but measured in peaks and valleys at the microscopic level. Thin epoxy systems need CSP 1-2 (fine sandpaper texture). Heavy polyaspartic and flake systems need CSP 3-4 (medium sandpaper).
A power-troweled garage floor in Neenah? That's CSP 0. Glass-smooth. Epoxy applied directly to that surface will peel up in sheets within months.
An oil-stained shop floor in Oshkosh? The contamination penetrates 1/8" deep. Surface cleaning doesn't touch it. You need to grind away the contaminated concrete entirely.
Common Surface Issues in Fox Valley Concrete
Wisconsin's freeze-thaw cycles create specific damage patterns you won't see in warmer climates. Water seeps into concrete pores, freezes, expands, and pops the surface layer off in chunks. That's spalling — and it's everywhere in unheated garages around Menasha and Kaukauna.
Sound familiar? Your garage floor has rough patches where the surface concrete flaked away. You see aggregate showing through. Small areas turned into dinner-plate-sized sections. Now you're wondering if coating will even stick.
Structural cracks (the ones that go all the way through the slab) move seasonally. They need flexible repair — epoxy injection for stability, then polyurea caulking that moves with the crack. Rigid patch materials just crack again.
Control joints (the grooves cut into new concrete) are designed to crack. If your installer doesn't route them deeper and fill with flexible sealant before coating, the coating will crack along every joint line within six months.
Moisture is the silent killer. Wisconsin basements often have hydrostatic pressure from high water tables. A calcium chloride moisture test takes 72 hours. Skip it, and you'll watch your coating bubble and delaminate as trapped moisture vapor pushes it off the slab.[1]
What Does Floor Prep Cost in the Fox Valley?
Prep typically runs 30-50% of your total coating project cost. A $3,000 epoxy job includes $1,000-$1,500 in prep. That's not padding the bid — it's reality for Fox Valley concrete.
The worse your concrete condition, the higher the prep cost. Clean, newer slabs (under 5 years) need basic grinding. Older garage floors with oil stains, cracks, and spalling can cost more to prep than to coat.
Grinding and Profiling Costs
| Surface Condition | Prep Required | Cost per Sq Ft |
|---|---|---|
| New/clean concrete | Single-pass grinding to CSP 1-2 | $2.00 - $3.00 |
| Oil-stained, sealed | Multiple passes, degreasing | $3.50 - $5.00 |
| Old coating removal | Aggressive grinding to bare concrete | $4.00 - $6.00 |
| Extensive spalling | Grinding + patching + re-grinding | $6.00 - $10.00 |
A 500 sq ft garage in Green Bay with moderate oil staining and an old sealer? Figure $1,750-$2,500 just for grinding. That includes dust containment (HEPA vacuums), multiple diamond grit passes, and final profile verification.
Crack and Spalling Repair Costs
Crack repair pricing depends on width, depth, and whether the crack is structural (moving) or dormant.
- Hairline cracks (under 1/8"): Routing and flexible sealant — $8-$12 per linear foot
- Medium cracks (1/8" to 1/4"): Epoxy injection + routing + sealant — $15-$25 per linear foot
- Structural cracks (over 1/4", full-depth): Epoxy injection with ports, polyurea top seal — $30-$50 per linear foot
Spalling repair (patching delaminated surface areas) runs $25-$40 per square foot of damaged area. That includes grinding out the loose material, applying polymer-modified patching compound, and re-grinding to match the surrounding profile. A typical Appleton garage might have 15-30 sq ft of spalling — add $375-$1,200 to prep costs.
Moisture Mitigation Add-Ons
Basements and below-grade spaces in Oshkosh often require moisture testing before coating. No exceptions if you want a warranty.
- Calcium chloride test (72-hour): $150-$250 per test location (minimum 3 locations per 1,000 sq ft)
- Relative humidity test (more accurate): $200-$350 for probe installation and reading
- Moisture vapor barrier primer: adds $1.50-$3.00 per sq ft to the coating system cost
If you test above acceptable moisture levels (over 3 lbs per 1,000 sq ft per 24 hours), you need a moisture-mitigating primer or a different coating system entirely. That changes the entire project scope and cost.
The Floor Prep Process
Professional prep follows a sequence. Skip steps or do them out of order, and you compromise the coating bond. Here's what happens from assessment to final cleaning.
Step 1: Surface Assessment and Testing
The contractor walks the slab looking for cracks, spalling, existing coatings, oil contamination, and surface hardness variations. They'll use a mohs pick or scratch test to check for sealers (many garage floors in Menasha were sealed by builders — it's invisible but prevents coating adhesion).
If it's a basement or the slab shows efflorescence (white mineral deposits), moisture testing happens now. Calcium chloride kits get taped down for 72 hours. RH probes get installed in drilled holes. You can't skip this step in Wisconsin — the ground stays saturated half the year.[2]
The assessment determines grinding depth, repair scope, and whether moisture mitigation is required. This is where accurate pricing happens.
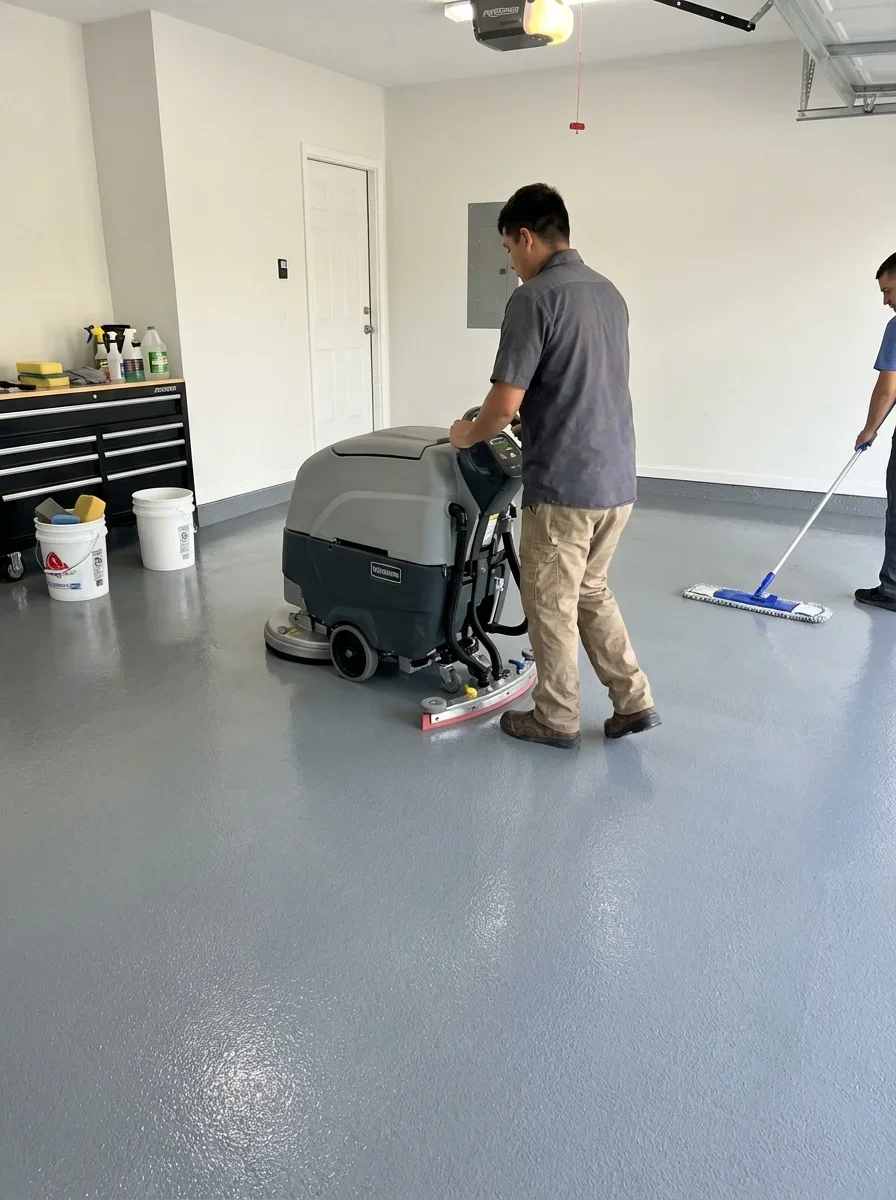
Step 2: Grinding and Profiling
Diamond grinding removes the top layer of concrete — typically 1/32" to 1/16" deep. That eliminates surface contaminants (oil penetrates about 1/8" deep, so you grind until you see clean concrete). It also creates the mechanical profile for coating adhesion.
Contractors use planetary grinders (multi-head machines with diamond-embedded discs) and HEPA dust collection systems. The process is loud and dusty even with vacuums. Plan on the space being unusable for 1-2 days for a typical residential garage.
First pass uses coarse diamonds (16-30 grit) to remove contaminants and old coatings. Second pass uses finer diamonds (60-80 grit) to create the final profile. The target CSP depends on the coating system — your contractor should verify the profile with a test patch or replica putty.
Step 3: Crack and Damage Repair
After grinding, cracks get routed (cut into V-grooves with a crack-chasing blade), blown clean with compressed air, and filled. Flexible polyurea goes into control joints. Epoxy injection with ports goes into structural cracks that need stabilization. Surface cracks get epoxy or polyurea depending on movement risk.
Spalled areas get squared off, cleaned thoroughly, filled with polymer-modified patching compound, and allowed to cure. Once cured (usually 24 hours), the patches get ground flush with the surrounding concrete. If you don't re-grind the patches, they'll show as different-colored spots through thin coatings.
Allow 24-48 hours after repairs before coating. Faster-curing products exist but cost more.
Step 4: Final Cleaning and Moisture Check
After grinding and repairs cure, the slab gets HEPA-vacuumed to remove all dust. Then it's wiped with denatured alcohol or a tack cloth. Any remaining dust or oils will show up as fish-eyes or delamination spots in the coating.
The contractor does a final moisture check (especially if there was any delay between testing and coating). They verify the surface profile with a replica tape or visual standard. Only then is the floor ready for primer or base coat.
From start of prep to ready-for-coating: 2-4 days for most residential garages in the Fox Valley, longer if extensive moisture mitigation or structural repairs are involved.
How to Choose a Floor Prep Contractor
Most epoxy installers do their own prep. Some subcontract it out. Either way, you need to verify they have the right equipment and knowledge — because this is where coating failures start.
Equipment and Experience Requirements
Ask what grinders they use. Handheld angle grinders are fine for small patches, but a 500 sq ft garage needs a planetary grinder (Husqvarna, Werkmaster, Diamatic are common brands). Scarifiers and shot-blasters work for some applications but create rougher profiles than diamond grinding.
Dust containment matters. Concrete dust is a health hazard and gets everywhere. HEPA-rated vacuums (not shop vacs) should be standard. If they say "we open the garage door for ventilation," that's not adequate dust control.
Ask about moisture testing protocols. If they don't mention calcium chloride or RH testing for basements and below-grade spaces, they're skipping critical steps. Kaukauna and Appleton have plenty of installers who learned this lesson the expensive way — after callbacks for bubbling coatings.
Crack repair experience separates good contractors from mediocre ones. Ask how they handle structural cracks versus dormant cracks, and what products they use. If they use rigid concrete patching compound for everything, they don't understand crack movement.
Red Flags: Skipped Prep Steps
"We acid-etch instead of grinding." Acid etching doesn't remove contaminants or create adequate profile for modern epoxy systems. It's a 1990s technique that coating manufacturers no longer recommend. Grinding is the industry standard.
"We'll just coat over the existing sealer." No. Sealers prevent coating adhesion. They must be removed via grinding. If a contractor doesn't test for sealers or plans to coat over them, walk away.
"Moisture testing isn't necessary — we haven't had problems." Translation: they've had problems and either didn't connect them to moisture, or they don't warranty their work. Any below-grade space in Green Bay needs moisture testing before coating.
"We can prep and coat the same day." Patches and crack repairs need cure time. Alcohol wipes need to dry. Rushing compromises adhesion. Quality work takes 3-5 days minimum for most garage projects.
Questions to ask when comparing contractors:
- What CSP profile will you achieve, and how do you verify it?
- Do you test for existing sealers and moisture before coating?
- What's your crack repair process for structural versus dormant cracks?
- What warranty do you offer on prep work specifically (not just the coating)?
- Can I see photos of prep work in progress, not just finished coatings?
The best contractors in Oshkosh and Neenah will walk your slab with you, point out issues, explain the repair plan, and give itemized pricing that breaks out prep from coating. If the quote just says "epoxy coating" with one price, you don't know what prep is included — and what'll be an upcharge when they arrive.
Frequently Asked Questions
While epoxy is durable and attractive, it has several notable drawbacks:
- High Initial Cost — $9–$15 per sq ft ($2,800+ for small garages) is a significant upfront investment
- Slippery When Wet — High-gloss finishes become slippery in wet conditions unless anti-slip additives are applied
- Surface Preparation is Critical — Concrete must be thoroughly cleaned, degreased, and repaired; poor prep leads to premature failure and peeling
- Moisture Sensitivity — Epoxy fails if moisture vapor escapes through concrete; requires moisture testing and mitigation before application
- Not Forgiving to Mistakes — Professional installation is essential; DIY errors are costly and difficult to repair
- Long Curing Time — Floors are unusable for 3–7 days during cure; heavy traffic too early can damage the coating
- Potential for Peeling — If prep is inadequate or moisture is present, epoxy can peel in patches—costly to repair
- Limited Repairability — Spot repairs are visible and difficult to match; re-coating large areas may be necessary
- Traffic Wear Patterns — High-traffic areas may show wear or dullness within 5–10 years
These issues are largely preventable with proper installation, moisture testing, and maintenance—which is why hiring a Type A specialist contractor is critical.
- Wisconsin Ready Mixed Concrete Association. "Six Steps to Quality." https://wrmca.com/consumer/consumer-information/six-steps-to-quality/. Accessed February 12, 2026.
- Wisconsin Department of Agriculture, Trade and Consumer Protection. "ATCP 33 Concrete Design Standards Chapter 4." https://datcp.wi.gov/Documents/CDSChapter4.pdf. Accessed February 12, 2026.
Related Articles
Epoxy Garage Floor Maintenance — How to Clean & Protect Your Investment
Learn what contractors recommend for cleaning and protecting epoxy garage floors. Understand maintenance schedules, proper cleaners, when to reseal, and signs you need professional help.
Read Guide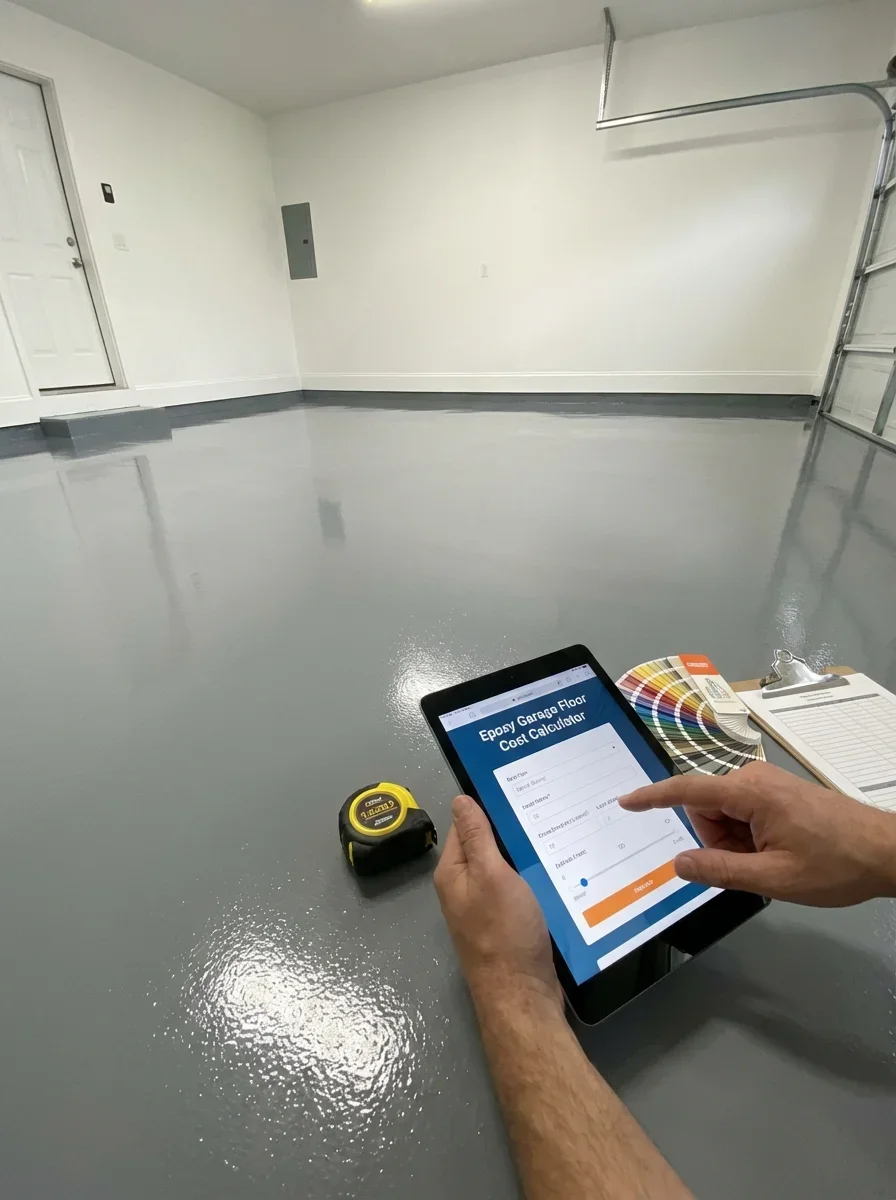
Epoxy Flooring Cost Calculator — Estimate Your Project Before Calling a Pro
Calculate your epoxy garage floor project cost instantly. Input your garage size, coating type, and options to get accurate estimates before calling contractors.
Read Cost Guide
Floor Prep & Repair — Why Surface Preparation Makes or Breaks Your Epoxy
Why surface preparation is critical for epoxy longevity. Professional concrete repair, grinding, and prep methods. Find qualified contractors in Fox Valley.
Read Guide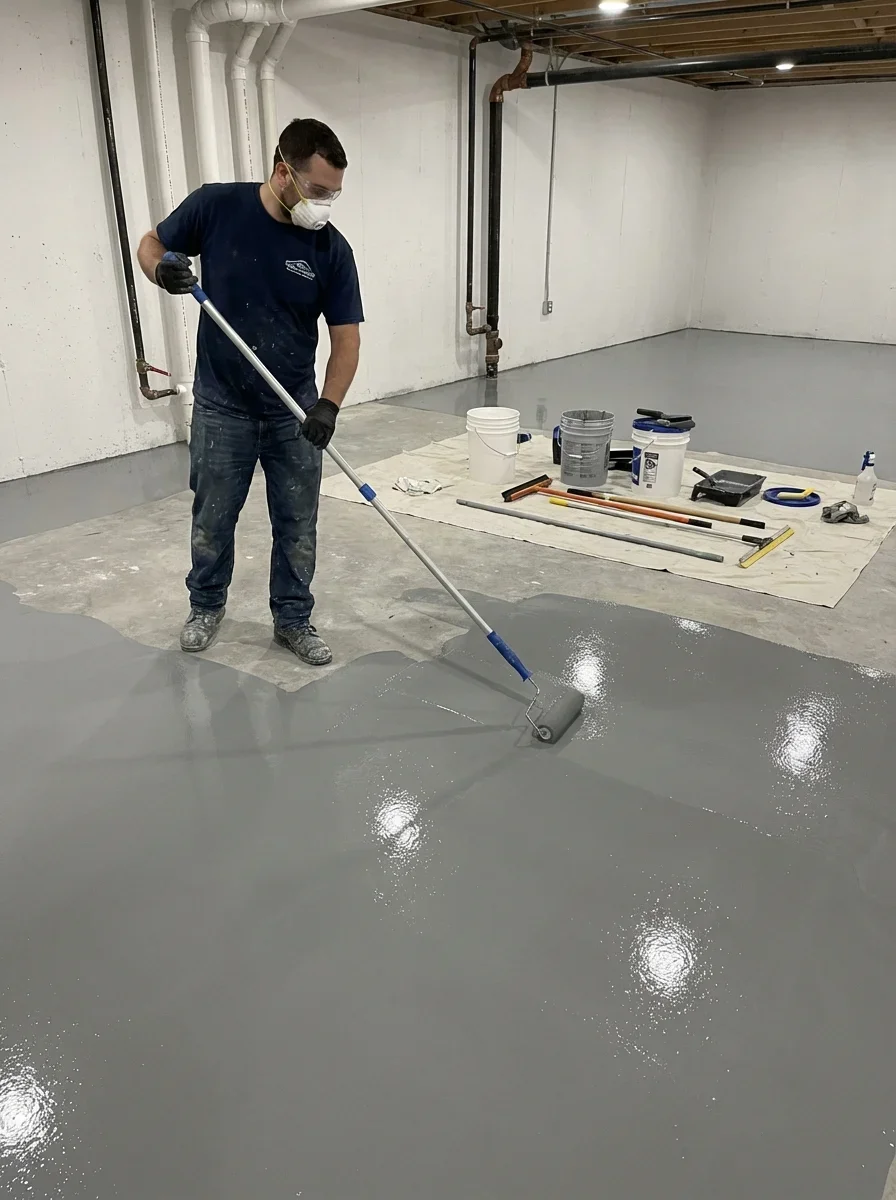
Additional Floor Services — Basements, Commercial & Concrete Polishing
Professional floor coating for basements, commercial spaces, and polished concrete. Find qualified contractors for specialized applications in Fox Valley.
Read Guide