What Is Flake Epoxy Flooring?
Flake epoxy is a multi-layer coating system that transforms damaged, stained concrete into a seamless decorative surface. Here's what makes it different from basic garage floor paint: you're building texture and depth, not just color.
The system works in three stages. First, a colored epoxy base coat bonds to the prepped concrete. While that base is still wet, decorative vinyl chips (the "flakes") are broadcast across the entire surface — either full-coverage or partial, depending on the look you want. After curing, a clear polyurethane or polyaspartic topcoat seals everything and adds UV resistance.
The flakes aren't just decorative. They create slip resistance, hide substrate imperfections, and add a subtle texture that makes the floor look professionally finished instead of painted.
How the Flake System Works
Think of it as a three-layer sandwich. The base coat provides color and adhesion. The flakes add visual interest and grip. The topcoat protects everything and brings out the depth.
Flakes come in dozens of color combinations — everything from neutral gray blends popular in Appleton garages to high-contrast black-and-white patterns you'll see in Oshkosh auto shops. Homeowners usually pick blends that hide dirt and road salt: tans, grays, browns with darker accents.
Size matters too. Quarter-inch flakes create a bolder, chunkier look with more aggressive texture. Eighth-inch chips deliver a finer, almost terrazzo-style finish. Most residential garages in the Fox Valley use 1/4" flakes — they're easier to broadcast evenly and create better slip resistance when winter boots track in snow.
Full-Broadcast vs. Partial-Broadcast Coverage
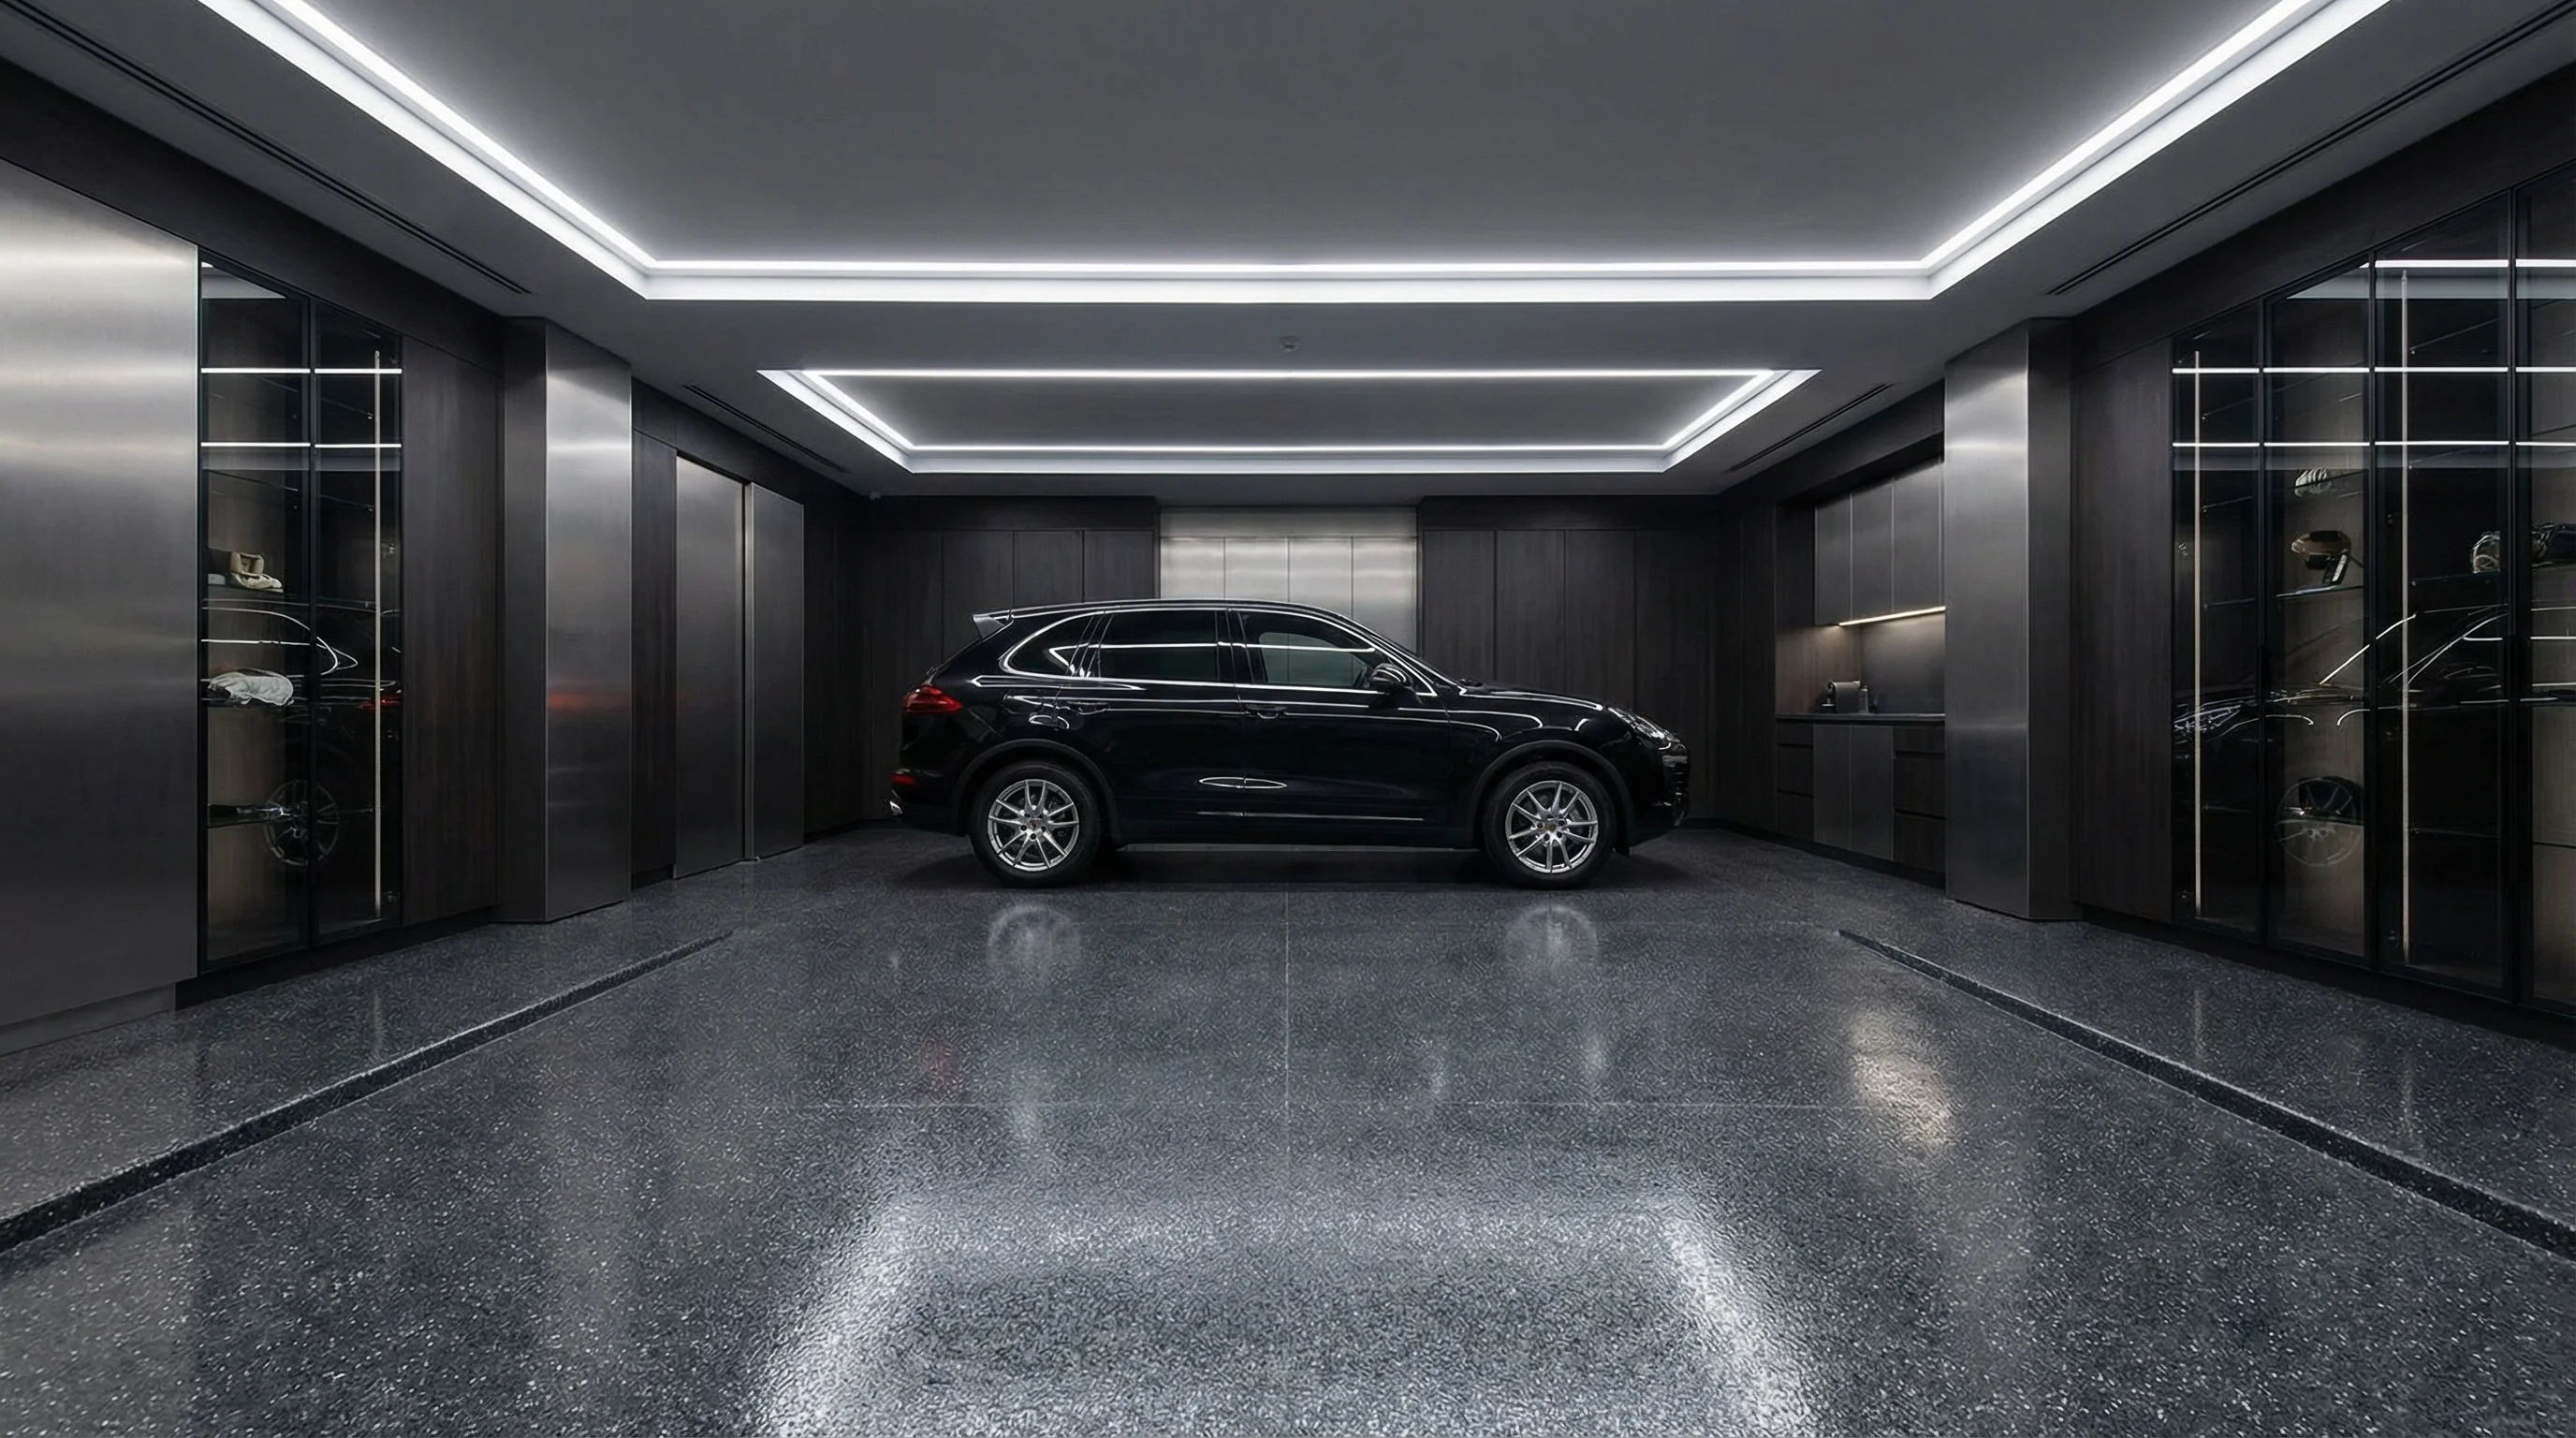
Full-broadcast means 100% flake coverage — you can't see the base color at all, just a dense layer of chips sealed under clear coat. This is the best option for hiding problem concrete: bad staining, patched cracks, color variations from previous coatings. It also creates the most durable surface because the flakes act as tiny wear points that protect the base coat.
Partial-broadcast (sometimes called "accent flake") covers 15-40% of the floor. You see more of the base color, with flakes scattered for visual interest. It costs less (fewer flakes, faster install), but it won't hide imperfections as well. Green Bay contractors typically recommend partial broadcast for newer concrete in good condition — where you're adding curb appeal, not covering damage.
Hiding power is the real benefit. Homeowners in Neenah choose flake systems specifically because the old garage floor is embarrassing. Oil stains from 20 years of parking. Cracks that keep spreading. The patching attempts that turned into different shades of gray. Full-broadcast flake coverage resets the entire surface.
What Does Flake Epoxy Cost in the Fox Valley?
Expect $4–$8 per square foot for a residential garage floor with standard prep and full-broadcast flake coverage. A typical 2.5-car garage (550–650 square feet) runs $2,200–$5,200 installed.
That range isn't arbitrary. The low end assumes good concrete that just needs cleaning and light profiling. The high end covers floors that need crack repair, moisture mitigation, or grinding to remove old coatings.
Pricing by Coverage Density
Flake density directly impacts both cost and appearance:
| Coverage Level | Flakes per Sqft | Cost per Sqft | Best For |
|---|---|---|---|
| Light scatter | 4–6 oz | $4–$5 | New concrete, decorative accent |
| Medium broadcast | 8–12 oz | $5–$6.50 | Balanced look, moderate hiding |
| Full broadcast | 16–20 oz | $6.50–$8 | Maximum durability, complete coverage |
Full-broadcast systems use 3-4 times more flakes than light scatter, which adds material cost and installation time. But you're also getting a floor that hides everything underneath and wears like a commercial surface.
Menasha contractors report that roughly 70% of residential installs use full-broadcast — homeowners don't want to see the concrete at all. The floor becomes the feature, not something you're trying to ignore.
Prep Work and Additional Costs
The concrete prep determines whether your coating lasts 2 years or 20. Here's what drives additional costs:
Diamond grinding ($1.50–$2.50/sqft): Required if you have existing paint, sealers, or oil penetration. A grinder removes the contaminated surface layer and creates the profile (texture) that epoxy needs to bond. Most Kaukauna garage floors built before 2010 need grinding — builders used cheap sealers that have to come off.
Crack repair ($3–$8 per linear foot): Control joints and settling cracks get routed out, filled with flexible epoxy, and sanded flush. This prevents cracks from telegraphing through the coating. Don't skip this — Wisconsin freeze-thaw cycles will keep moving those cracks.
Moisture mitigation ($1–$2/sqft): If the concrete tests above 4 lbs/1000 sqft moisture vapor emission, you need a moisture-blocking primer. Basements and slab-on-grade floors in older Appleton homes frequently need this — especially if there's no vapor barrier under the concrete.
Topcoat upgrades: Standard polyurethane topcoats cost less but yellow under UV exposure (bad for floors near garage doors). Polyaspartic topcoats add $0.50–$1/sqft but cure faster and stay clear. Most contractors default to polyaspartic for garage floors that see sunlight.
Add it all up: a 600-sqft garage with moderate prep, full-broadcast flakes, and polyaspartic topcoat typically lands around $4,200–$4,800 in the Fox Valley. That's $7–$8/sqft all-in.
The Flake Epoxy Installation Process
A proper flake epoxy install takes 2-3 days, with most of that time spent on surface prep and cure time between coats. Wisconsin's humidity affects cure rates — spring and fall installs often need extra time between coats compared to low-humidity winter months.
Surface Preparation and Moisture Testing
Day one is all prep. The contractor starts with moisture testing using calcium chloride kits — they need to know if ground moisture will interfere with adhesion. Any reading above 3-4 lbs per 1000 sqft requires a moisture-blocking primer.
Next comes mechanical prep. Diamond grinders remove surface contaminants and create a rough profile (feels like 60-grit sandpaper) that gives the epoxy something to grab. Every square inch gets profiled — missing spots mean delamination later.
Cracks wider than 1/8" get routed into a V-groove, filled with flexible epoxy crack filler, and feathered smooth. Control joints get the same treatment. The goal is a uniform surface with no loose material and no pathways for moisture.
After grinding, the floor gets HEPA-vacuumed twice, then wiped with denatured alcohol or acetone to remove residual dust. The concrete needs to be bone-dry before coating — most Green Bay contractors check with a moisture meter and won't start coating unless the surface reads below 4%.
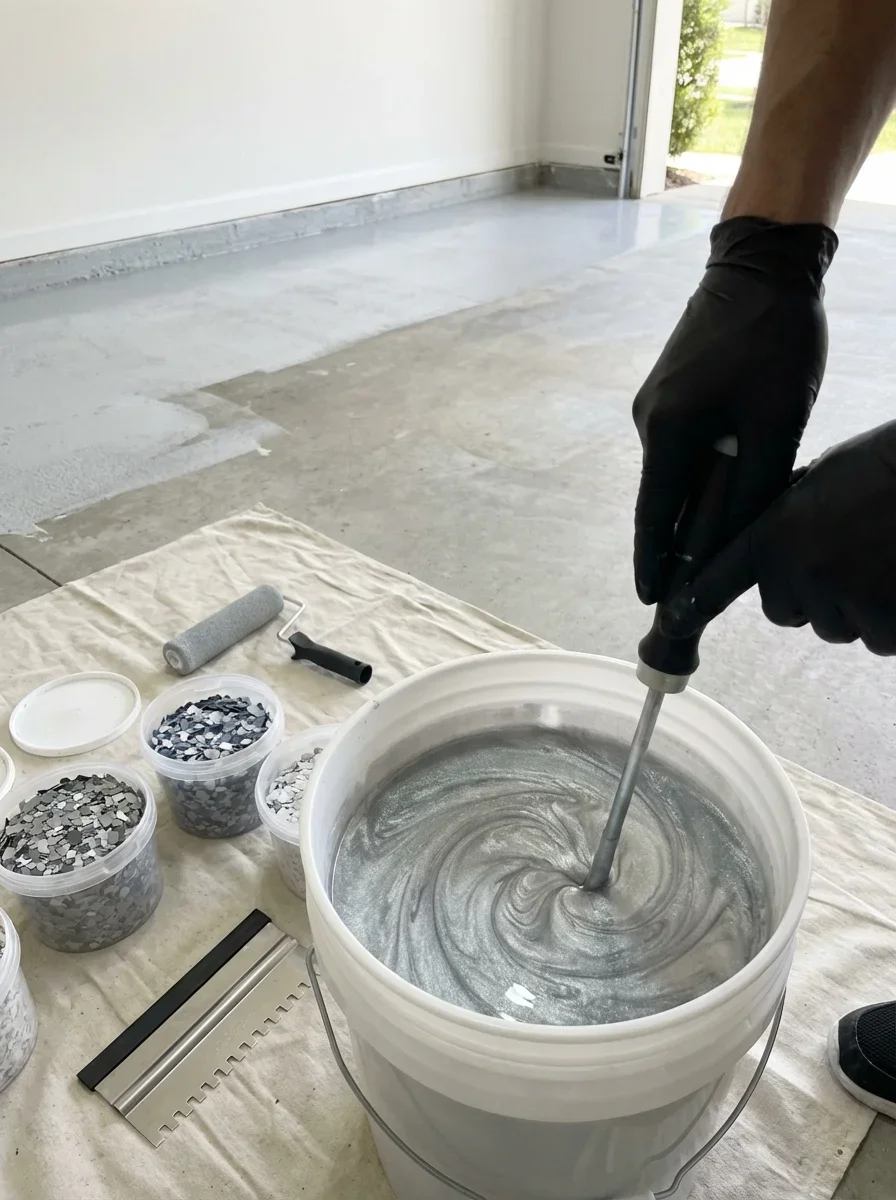
Base Coat Application and Flake Broadcasting
The base coat goes down on day one or early day two (depending on prep time). Contractors pour 100% solids epoxy along the back wall and roll it out in 4-foot sections using 1/2" nap rollers. The coating needs to go down at 12-16 mils wet thickness to give the flakes a bed to stick into.
Here's where timing matters. The flakes get broadcast while the base coat is still tacky — usually 10-40 minutes after rolling, depending on temperature. Too early and they sink; too late and they don't stick. Experienced installers work in teams: one person rolling, one person broadcasting flakes from a scoop or broadcast hopper.
For full-broadcast coverage, they throw flakes until you can't see base coat anymore — it looks like someone dumped a bag of confetti across the entire floor. Excess flakes stay on the surface until the base coat cures (4-8 hours in Fox Valley summer temps, longer in winter).
Once cured, the floor gets scraped with wide blades to knock down any flakes standing on edge. Then another vacuum pass removes loose chips. What's left is a rough, textured surface locked into the epoxy base — ready for topcoat.
Topcoat and Sealing
Day two or three: the clear topcoat. This is typically two coats of polyurethane or one heavy coat of polyaspartic. The topcoat does three things: it locks down any remaining loose flakes, it adds chemical resistance (fuel, oil, de-icer), and it creates the glossy finish that makes the floor look wet.
Polyaspartic topcoats cure fast enough that you can walk on the floor in 4-6 hours and drive on it the next day. Polyurethane needs 24 hours between coats and 72 hours before vehicle traffic. Neenah contractors prefer polyaspartic for garage floors because homeowners want their space back quickly.
Most systems finish with a light dusting of fine grit (aluminum oxide or silica) broadcast into the final topcoat for slip resistance. This is optional but recommended for areas that see water, snow melt, or ice melt tracked in from driveways.
Cure time: 24 hours for foot traffic, 5-7 days for vehicles. Don't rush this — heavy loads on uncured coatings will leave tire marks or scuff the finish.
How to Choose a Flake Epoxy Contractor
The cheapest quote usually comes from someone who's skipping prep steps. Your floor might look good for six months, then start peeling at the edges where they didn't grind properly. A qualified flake epoxy installer invests more time in prep than coating — and that's what you're paying for.
Questions About Materials and Warranty
Ask what brand of epoxy they're using and at what mil thickness. "Two-part epoxy" isn't specific enough. You want 100% solids epoxy applied at 12-16 mils for the base coat. Water-based or low-solids coatings won't hold flakes properly and won't last.
Topcoat matters even more. Get clarity on polyurethane vs. polyaspartic, and whether it's UV-stable. A yellowed floor ruins the whole look — especially if you picked light-colored flakes.
Warranty should cover delamination and wear-through for at least 5 years on residential floors. Some Appleton contractors offer lifetime warranties on full-broadcast systems because they're that confident in their prep work. If the warranty only covers materials (not labor), that's a red flag — they're not standing behind their installation.
Ask about moisture testing explicitly. If they don't mention calcium chloride kits or moisture meters, they're winging it. Wisconsin basements and slab-on-grade floors can have moisture issues that wreck coatings — a pro tests before quoting.
Portfolio Review and Coverage Options
Ask to see recent installs — not just photos, but actual customer references in Oshkosh or Kaukauna you can contact. Look specifically at floors that are 2-3 years old. How's the topcoat holding up? Any peeling at the edges? Discoloration around the garage door?
Review their flake broadcast technique. Do they offer both full and partial coverage, and can they explain when each makes sense? If they push partial broadcast on a stained, cracked floor, they're trying to save time and flakes — not solve your problem.
Pay attention to how they talk about prep. The right contractor leads with prep, not with flake colors. They want to see your floor before quoting because prep variables (grinding, crack repair, moisture mitigation) drive the real cost.
Red flags:
- Quoting over the phone without seeing the concrete
- Using single-part "epoxy paint" instead of two-part coating systems
- Skipping moisture testing in basements or older homes
- No clear cure time instructions (when you can walk, when you can park)
The Fox Valley has plenty of contractors doing flake epoxy floors. The difference between a 3-year floor and a 15-year floor comes down to prep rigor and material quality — and those don't show up until after the installer is gone. Choose the contractor who talks more about your concrete than their color options.
Frequently Asked Questions
Epoxy typically lasts 10–20 years on a residential garage floor, depending on traffic, maintenance, and installation quality.
| Lifespan Factor | Light Use | Moderate Use | Heavy Use |
|---|---|---|---|
| Typical Duration | 15–20 years | 10–15 years | 7–10 years |
| Example | Occasional DIY garage | Active family garage | Commercial/frequent traffic |
| Maintenance Level | Minimal | Moderate (annual) | Frequent (quarterly) |
| Wear Patterns | Minimal gloss loss | Some dullness in traffic areas | Noticeable wear, possible thin spots |
Factors that extend lifespan:
- Professional installation — Proper prep and application prevent premature failure
- Moisture management — Moisture testing and mitigation prevent peeling and delamination
- Regular cleaning — Sweeping and occasional mopping preserve the finish
- Anti-slip topcoat — Polyurea or polyaspartic topcoats extend durability and add UV resistance
- Climate control — Temperature stability reduces expansion/contraction stress
Factors that shorten lifespan:
- Heavy vehicle traffic — Daily driving wears the finish faster
- Harsh chemicals — Road salt, de-icing chemicals, and aggressive cleaners accelerate degradation
- Poor prep or moisture — Failure to address moisture or skip surface prep causes peeling within 2–5 years
- DIY installation — Inadequate technique reduces durability by 30–50%
With proper maintenance and professional installation, most homeowners see 12–15 years of excellent appearance before considering a refresh or top coat.
Related Articles
Specialty Floor Coatings — Metallic, Polyurea, Polyaspartic & Flake Systems
Compare specialty garage floor coatings. Learn how metallic epoxy, polyurea, polyaspartic, and flake systems differ and when contractors recommend each type.
Read Guide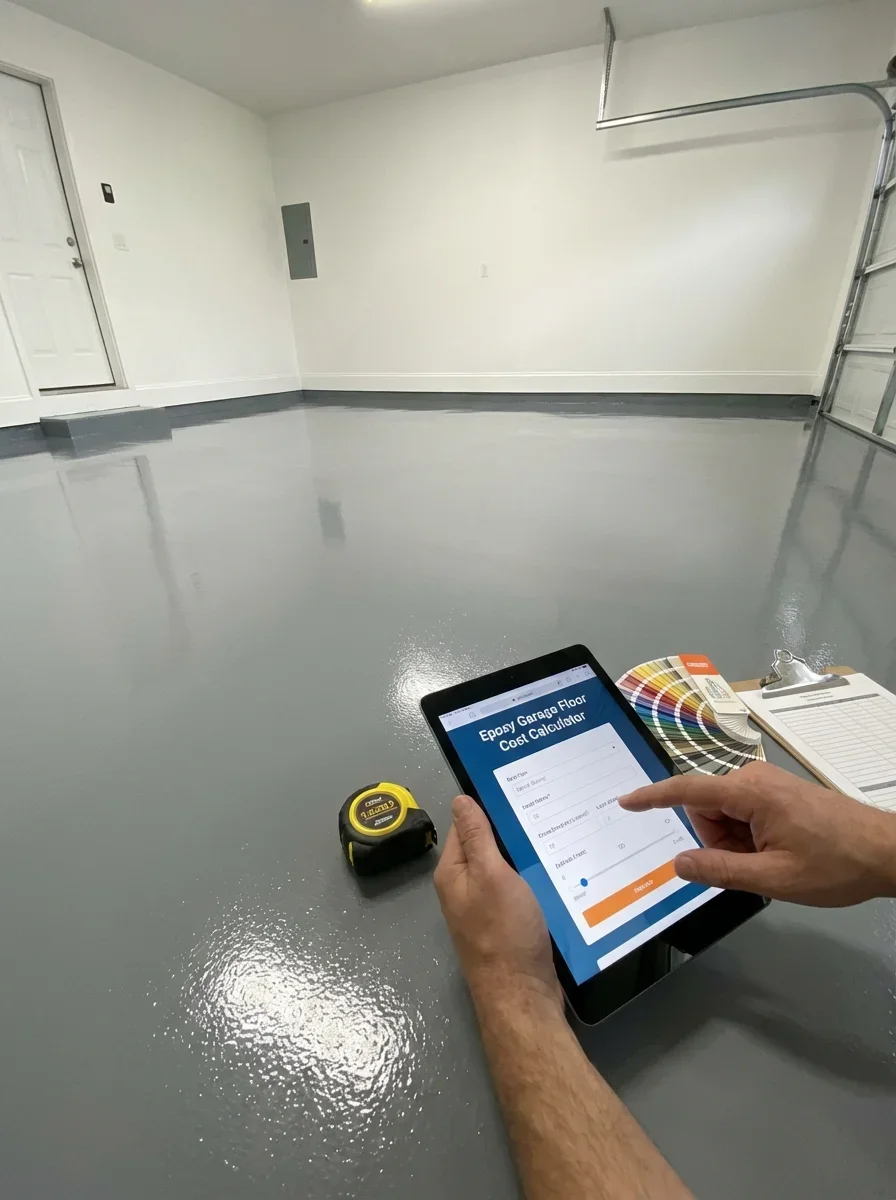
Epoxy Flooring Cost Calculator — Estimate Your Project Before Calling a Pro
Calculate your epoxy garage floor project cost instantly. Input your garage size, coating type, and options to get accurate estimates before calling contractors.
Read Cost Guide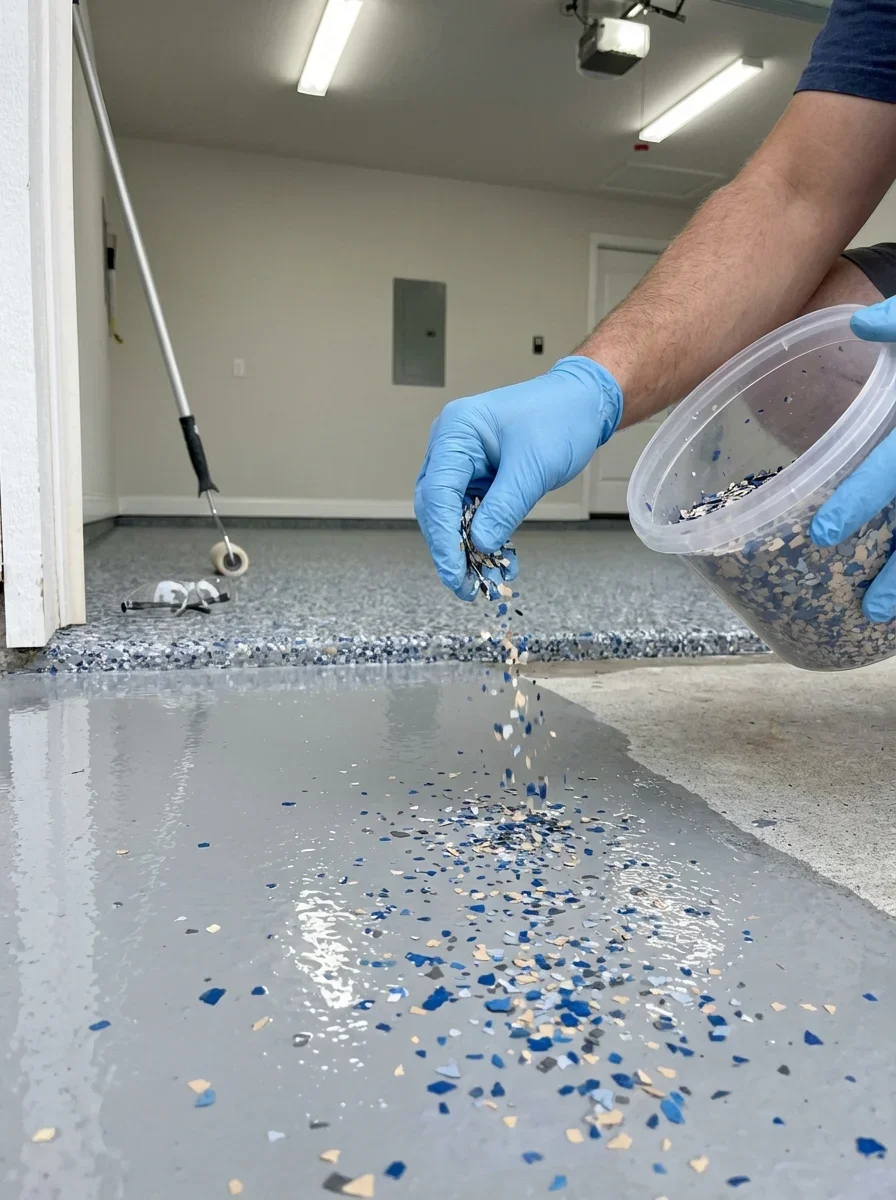
Flake Epoxy Floors — Colors, Styles & What Professional Installation Includes
Explore flake epoxy floor colors and styles. Learn what professional installation includes, how contractors apply chip systems, and how to choose the right look.
Read Guide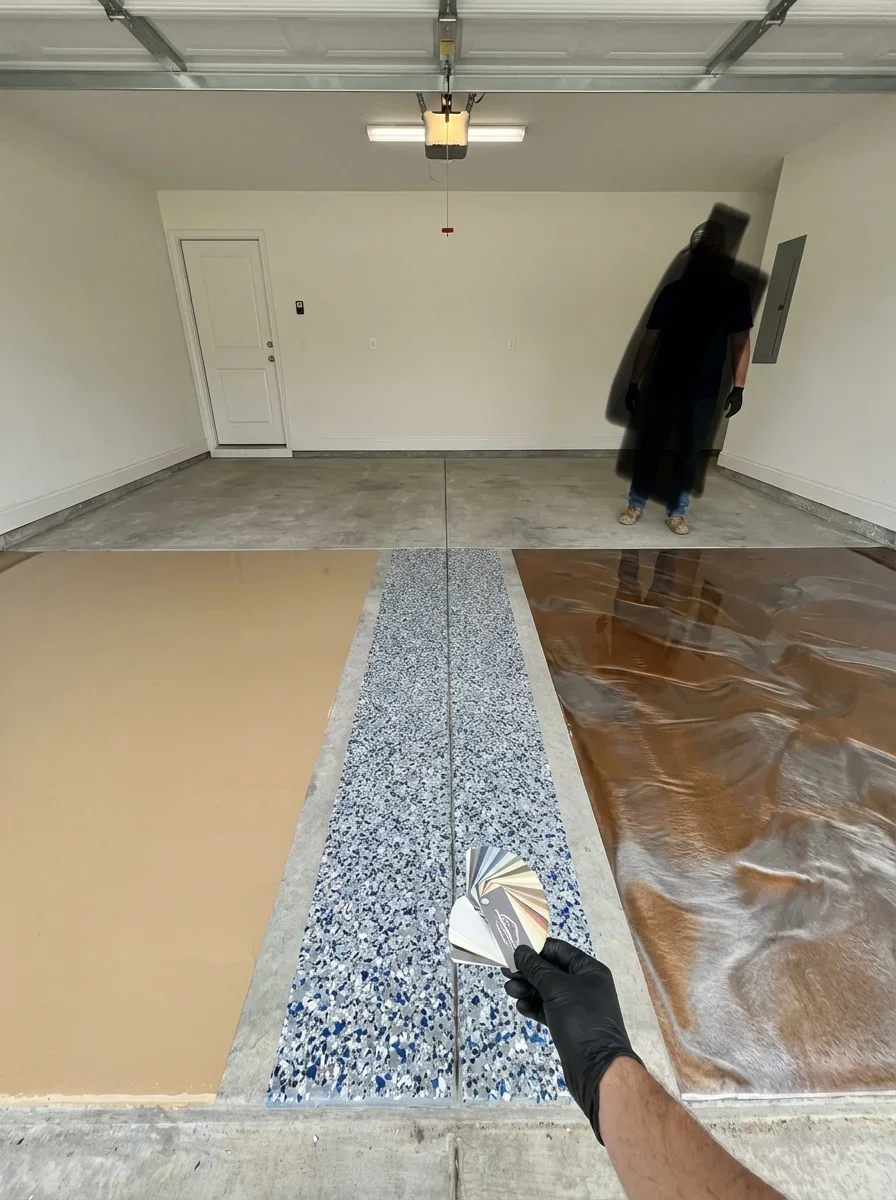
Epoxy Garage Floor Colors — A Homeowner's Guide to Design Options
Explore epoxy garage floor color options from neutral to bold. Learn what contractors recommend, popular color combinations, and how to choose the right look.
Read Guide
Epoxy Garage Floor Design Trends — What Contractors Are Installing in 2024
Explore current garage floor coating trends from color shifts to metallic finishes. Learn what contractors are installing, why certain looks require professional expertise, and what's popular in Fox Valley.
Read Guide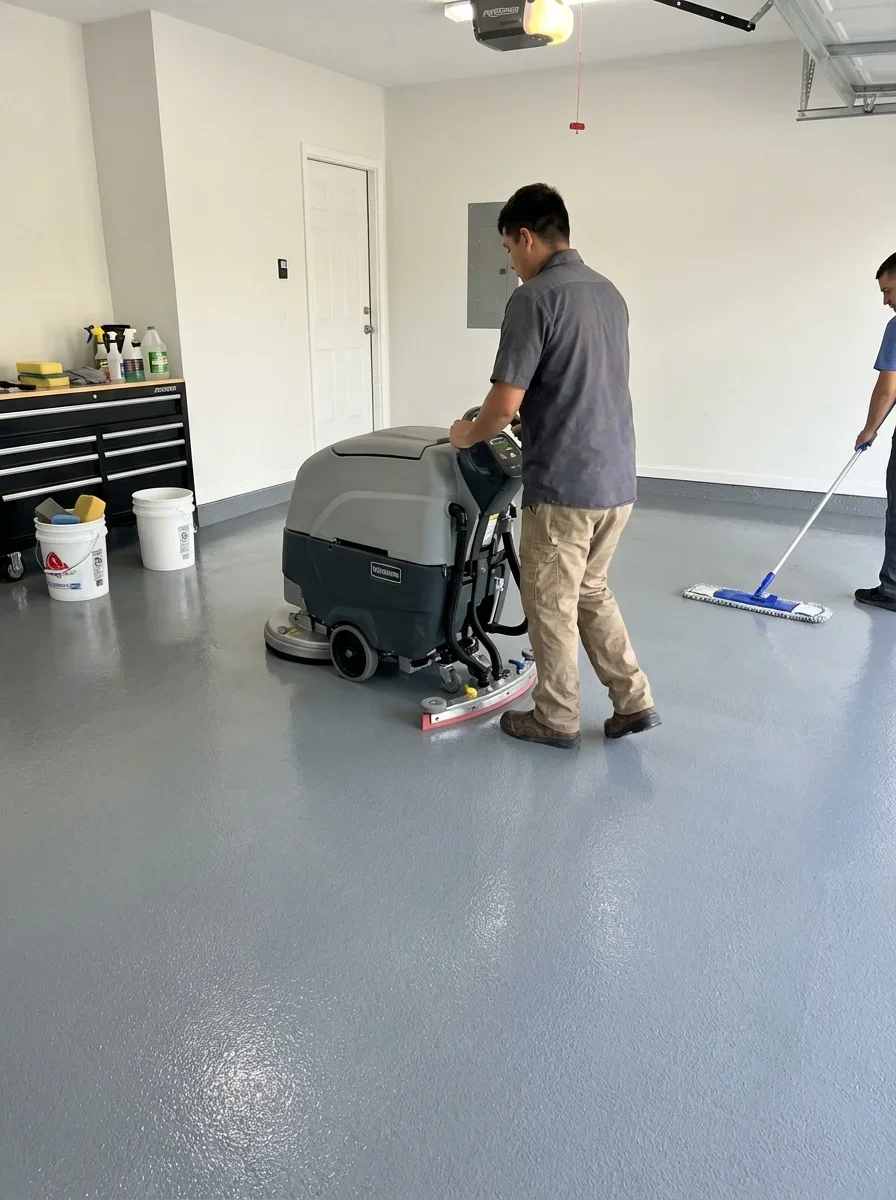
Epoxy Garage Floor Maintenance — How to Clean & Protect Your Investment
Learn what contractors recommend for cleaning and protecting epoxy garage floors. Understand maintenance schedules, proper cleaners, when to reseal, and signs you need professional help.
Read Guide